This is a large post because a lot has happened and I haven't posted any pictures since the end of July. Early in August we received the granite counter tops from Carolina Stone Works.
 Dave and Randy were the installers. I curse that pack of Marlboro's on top of the tool chest since Randy smoked the whole pack, taking them outside, which is good, and not to whine, but he flipped the butts out into the yard using a 180% scatter pattern 20 ft from the front door. It almost got me to post a sign...
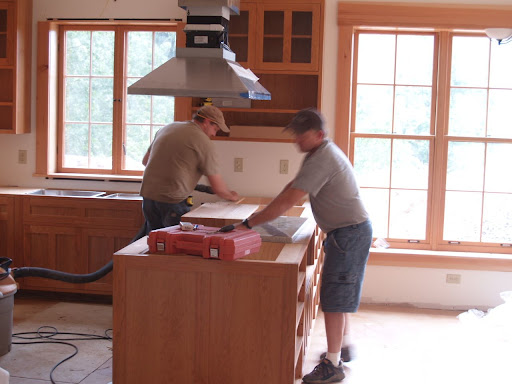
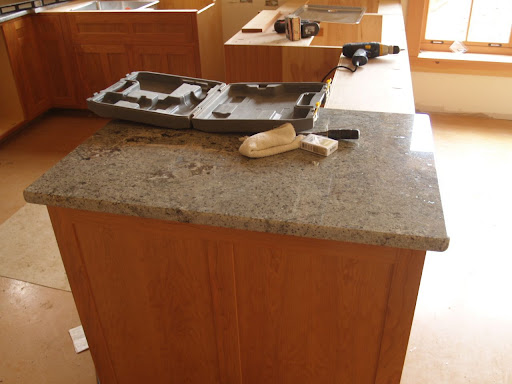
 The color in the shot below is the closest to the way it actually looks:
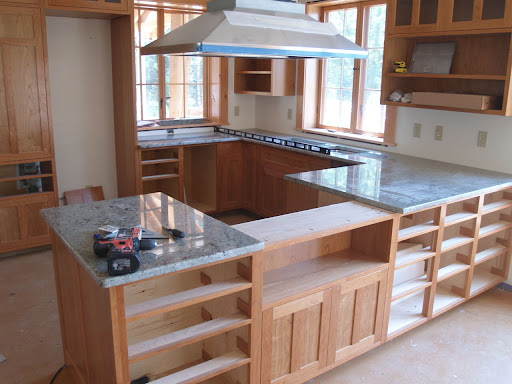
 Brother Scott made another trip down from Virginia to install all the drawers; he combined our job with the Groves Family Reunion on August 16-17, so we went down to York SC with him. Unfortunately we didn't have the knobs yet, but it turned out he needed another piece of wood for the nicknacks shelf anyway, so another trip will be required.
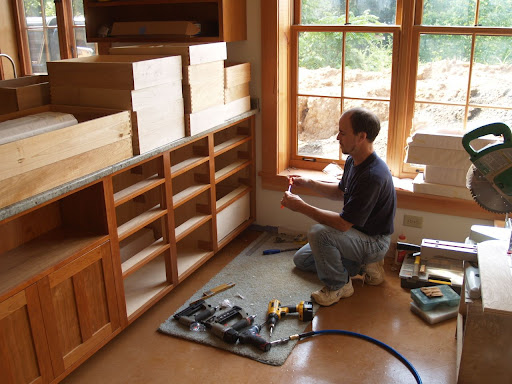 Following on the July post's cliffhanger, I found that by moving the same dirt 2 or 3 times, I could build then remove a ramp to get the tractor out of it's tight spot. Here is a continuation of the 3 foot deep trench for the electric supply.
 Such a beautiful hole!
 A hole which unfortunately threatened to cave in as soon as it got wet. The earth next to the house was making crackling sounds, which is surely not a good sign. The sides of the crate the bathtub proved handy to keep it open:
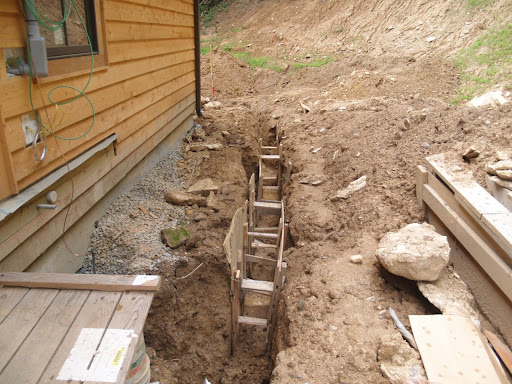 The ditch complete, French Broad Electric (local co-op from the rural electrification days) rolled up to lay the wire and conduit:
 Conduit in the hole:
 Feeding the wire through the conduit is done with lots of grease - both elbow and the real stuff.
 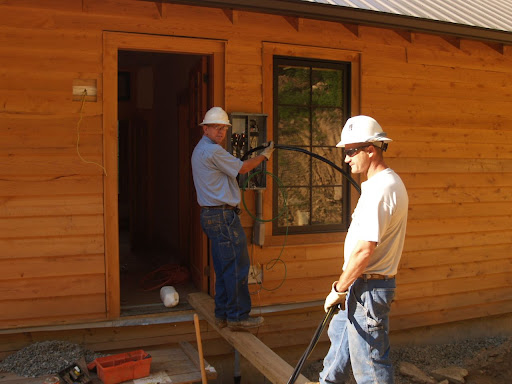 Normally you pull wires through, but with this thick 3-strand cable - must be 6 gauge wire - it's done just by pushing - from the uphill side naturally
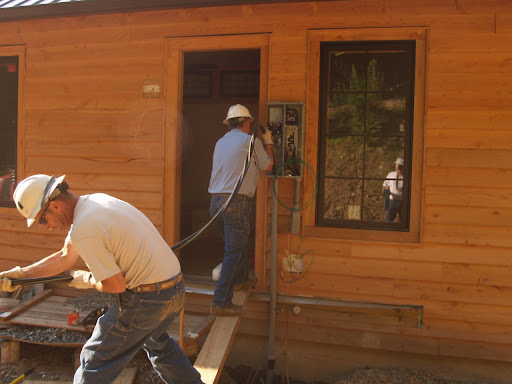 And the end emerges at the pole. Note that the electrical service runs under the plumbing where they cross.
 Next the crew fills the ditch up about a foot then lays a warning ribbon down so if you are digging in the future you hit the ribbon before the wire, hopefully.
 Lastly the high-paid man goes up the pole to prepare the connection. But don't get any ideas about actually getting a connection! No power to the house until after you get the CO (certificate of occupancy) from the county building inspector.
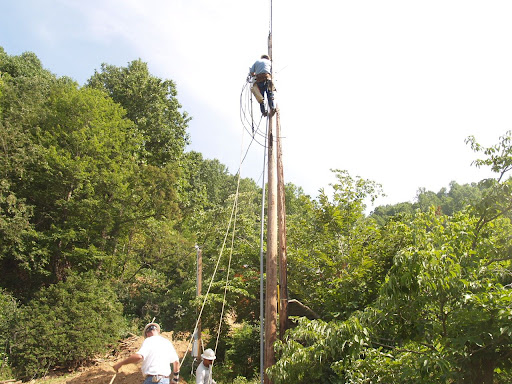 Besides digging in the dirt, I was under the gun to knock out some woodworking projects so that the plumbers could finish the fixtures install. Here is the stand for the porch sink, made from local cherry:
After the plumbers: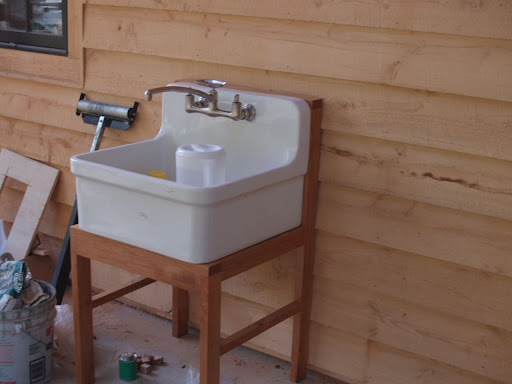 But what's with that fixture? (Hitch #1) Seems the Ferguson plumbing supply lady wasn't on top of matching faucets to sinks. Charla got on the phone.
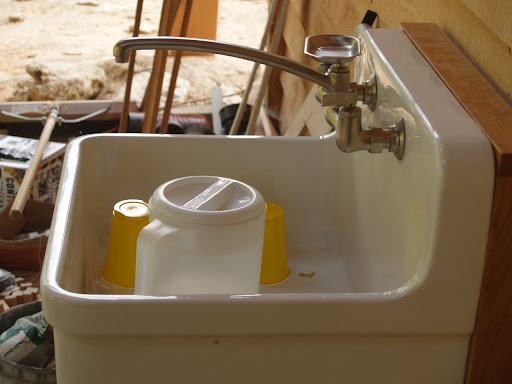 And a white oak stand crafted for the sunroom sink:
 Saying that I "knocked out" these stands is a bit facetious - each of them consumed an entire weekend and then some.
Blue Sky sent out a different plumber, here hooking up the kitchen faucet:
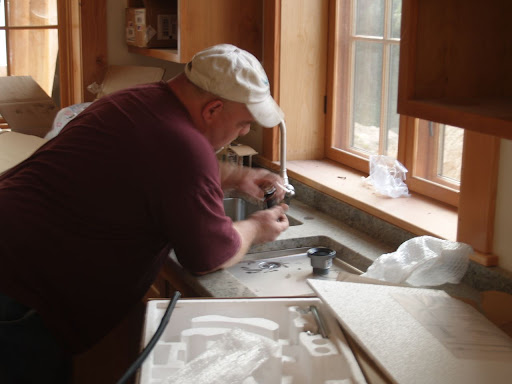 and dishwasher. (Hitch #2) Turns out the faceplate and handle we got from the appliance place doesn't fit the dishwasher. Robert got on the phone.
 Once the fixtures were in we were ready to charge the house water system. But the previous evening, for hitch #3, the outdoor faucet broke it's connection on the main pipe, creating a good sized stream down the driveway. Luckily the break was below the valve. George (here helping out since the family reunion) got in the truck and got replacement fittings and the fence pole you see next to the faucet below which should keep the hydrant from stressing the joint. The plumbers were kind enough to wait for the glue to dry so they could test the system without having to make another trip.
 Once the water was on, it started pouring out of a wall in the mechanical room! (Hitch #4) It seems the tile guy must have punctured the line when he was putting the tile backing board up. After shutting off the water, we removed a chunk of ceiling sheetrock to take a look up there. The leak was definitely inside the wall behind the plywood. That's when it occurred to me that they could bypass the line in the wall - since it's the mechanical room, just route the pipe down the outside of the wall. The plumbing guys quipped that I should be a supervisor. The white pipe in the corner is the workaround:
 And then there was Hitch #5. The Ferguson lady also neglected to order a bath/shower valve that had a diverter to get water to the shower, and the bath fill spout doesn't have one either, nor is one available in the pretty expensive trim line we ordered. Charla got on the phone! They gave us a new setup (hitch #5.1 it didn't arrive with the valve in the box as the packing slip claimed, which we didn't notice for several days, so we had to pay $110 for the replacement valve). Getting that valve in required digging into the wall from the back side, which is in a closet fortunately.
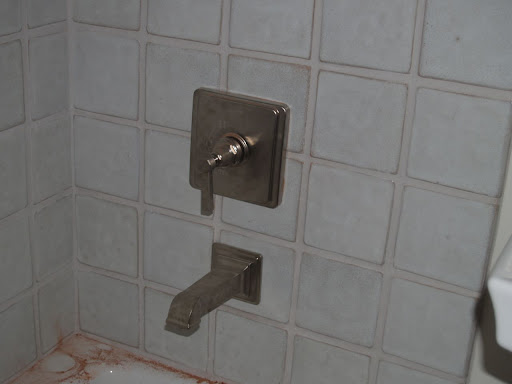 That's called a change order and the plumbers charge time and material for it. But we ended up with what we wanted. At Charla's urging, Ferguson found a shorter neck for that porch sink, and our Hitch backlog started to clear.
 The next big project was getting the stairs in. Charla specified white oak to match the flooring upstairs. I guess I haven't already related the saga of how hard it is to find 18 foot lengths of white oak. The lumberjacks always cut the logs to 16 or 12 feet when they cut the tree. My man Dan Quinn (see photo in earlier post - he milled the hemlock siding for me) was generous enough to cut a huge oak off his own land and make up my beams to order back in May. I took them to the Mars Hill Dry Kiln - right down the road (also real nice fellows) where they dried out until early August.
Rich from Southface Builders came up to mortise the beams (mortising is cutting a slot into the wood to form a "mortise and tenon" joint by shoving another board - the tenon - into the slot):
 Rich made up the treads with tenons at his shop using "eight-quarter" (2 inch thick), 12 inch wide white oak planks:
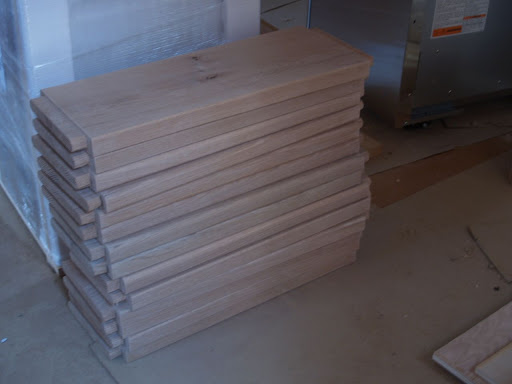 George and I put the sealer on the lumber before assembly. Don't be fooled by the picture of the stringers below - those beams really are crooked! Assembling this puppy was starting to look daunting...
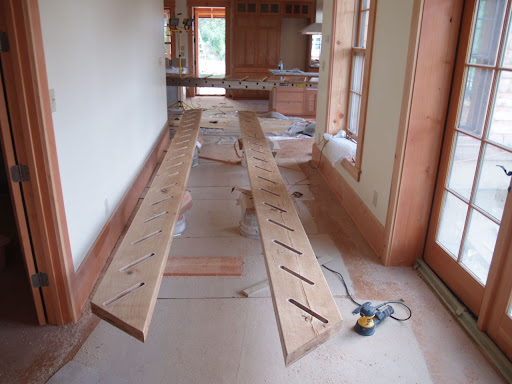 The treads spread out for 3 coats of sealer:
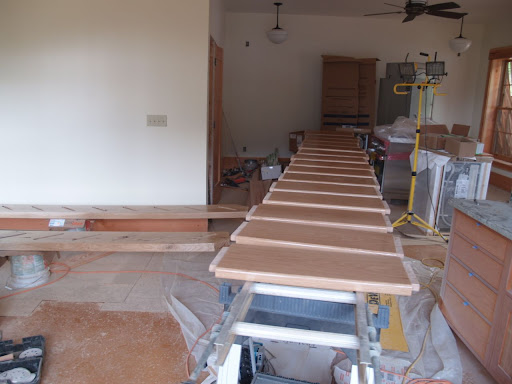 I'm sorry I got no action shots of the stairway assembly - we were way too busy with hammers and clamps. It was done by pressing all the treads into the wall-side stringer, then screwing them tight from the back of the stringer, using no glue so that they would have some play. Next we set it on buckets, then laid the outer stringer on top which had to be glued (since screws would show). The curve in the top board was up, so that worked in our favor to allow the beam to be pressed down on each step in turn from one end to the other, like a zipper being zipped. But it was tight! A few more clamps would have made it easier. Here it is with the glue drying:
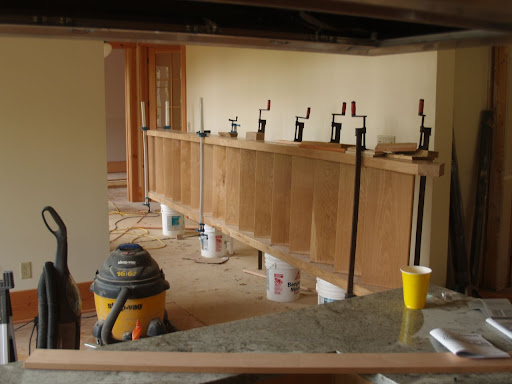 Did I mention that this was done on the same day as we first turned the water on?
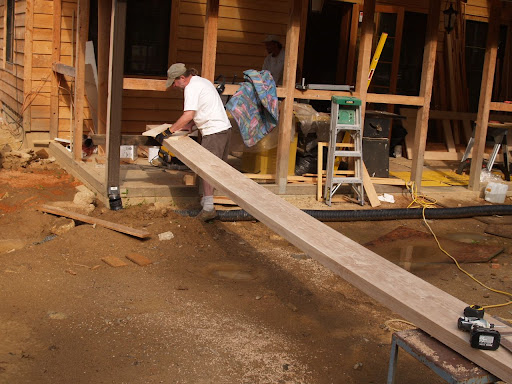
After letting the glue dry over the weekend, we got ready to hoist them into place. This white oak is very heavy wood. I'd estimate the unit weighs more than 1000 pounds.
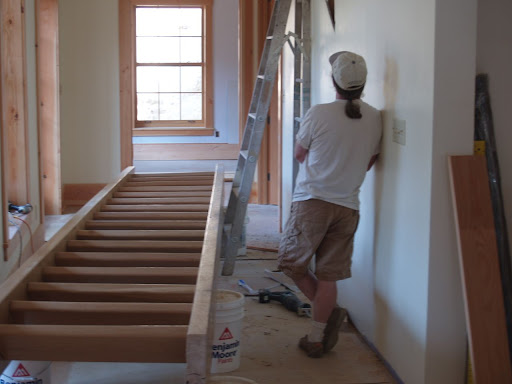 I had a 6x6 beam from our Douglas Fir stash, so we set that across the upstairs floor and put a (very nice heavy duty) come-along winch from it to the stairs.
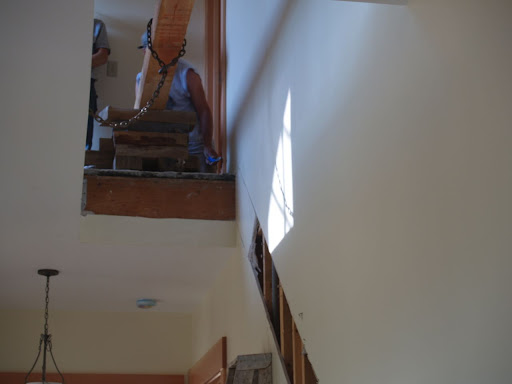 The bow in the wall could not be tolerated, so the sheetrock had to go. Lifting the stairs went surprisingly well - should I subtract one from my hitch count? Nah. George stands by:
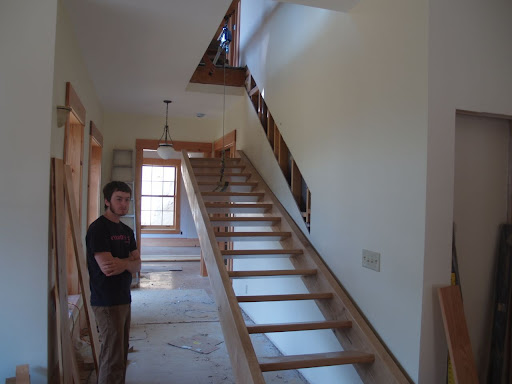 Steve wrangles the winch:
 with the help of Dave
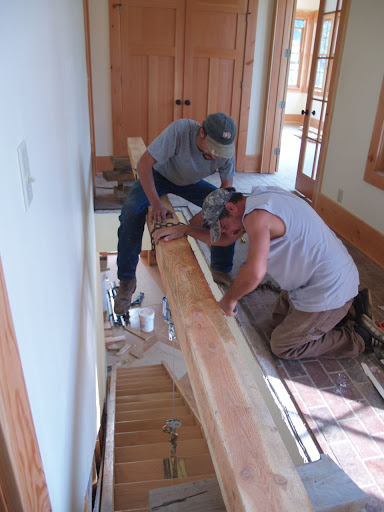 We had to prop them up a couple of times to reposition the winch. That felt dangerous. But all went off without a hitch
 Finally we needed to shove them tight to make all fast from the bottom with help of a 5 lb hammer. One swing of which put Rich's index finger out of commision for about a week. Sorry about that!
 Things are starting to look like a staircase:
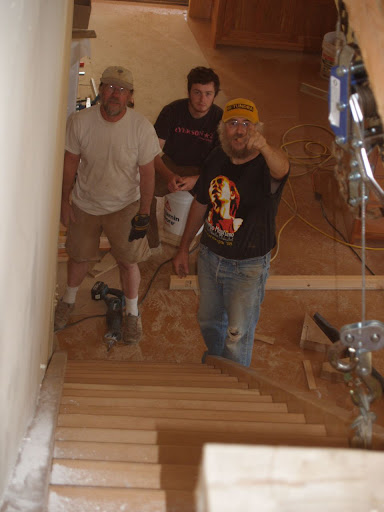 As designed, the staircase does not interupt the flow of light or air on the lower floor.
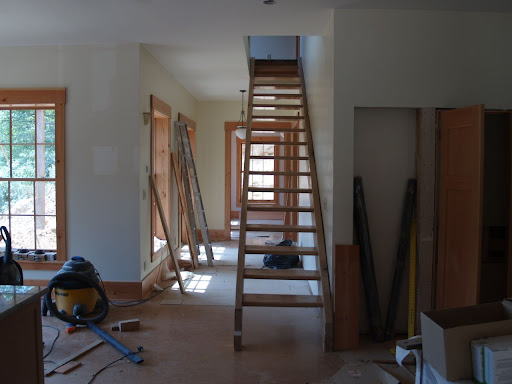
 Steve gives them a test run:
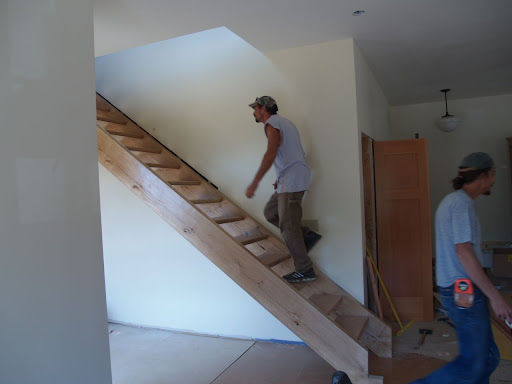 I want to build a nice white oak balustrade, but with my speed I know I can't get it done before winter. So we go with a temporary railing to get us through the final inspection, starting with pine 2x4 for the handrail
 and recycled pine 4x4's for the newels
 Carving out some slots on a 2x6 midpost
 supports a country-fence system that has no opening over 4" - so it meets CODE. Meeting CODE starts to become real important when you can't move in until the final inspection is signed off. These stairs are on the hairy edge of what's allowed in several dimensions which I won't document here :)
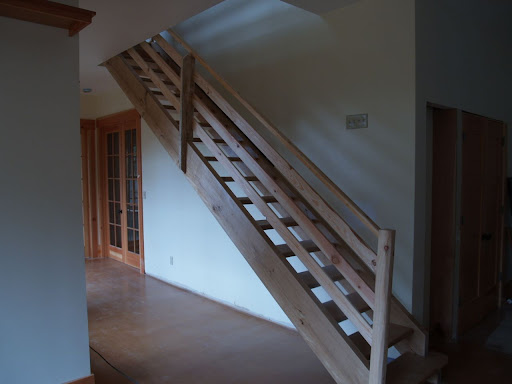 Those temporary railings don't look nearly as bad as I feared it would.
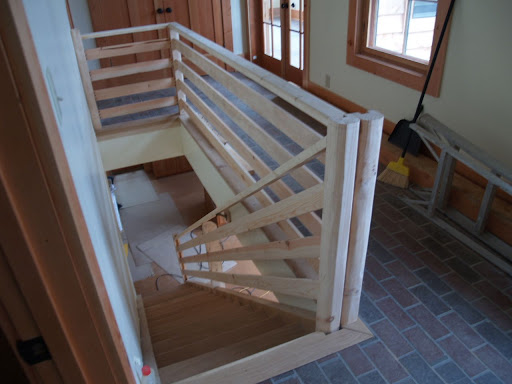 Finished, with the bottom step. And finally: trim on the closet/bookcase combo next to the stairs!
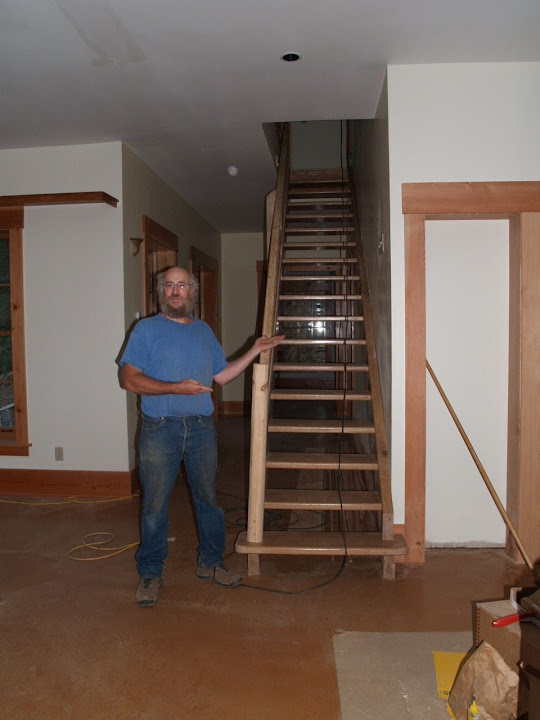 Next big project - back to the dirt. I used the top 9" of the electrical trench to route roof gutter and footer drain pipes.
 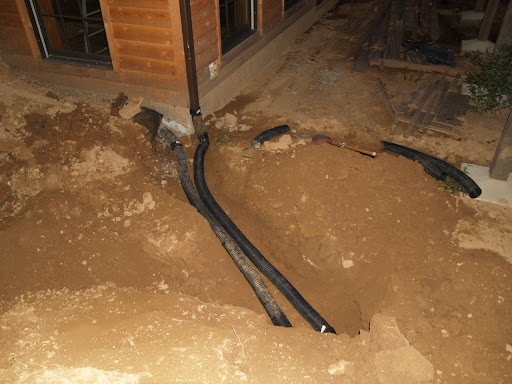 Then we filled up that ditch and started digging another for the sewer. It was high time since we had been putting some test water into the various sinks which was piling up in the dead-end pipe under the house.
 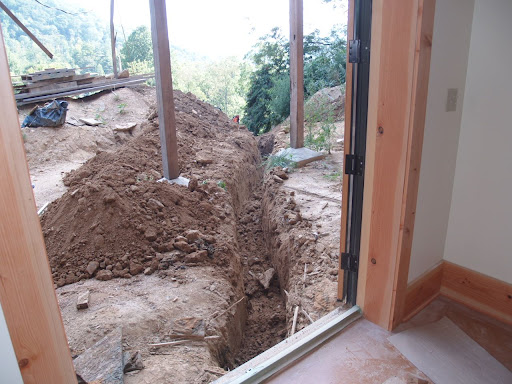 George got into the action this time. 18" is deep enough for a sewer line so it went a bit faster then the 3' electrical trench.
 Next we glued up the 4" PVC pipe - it takes two to get those pushed together before the glue dries.
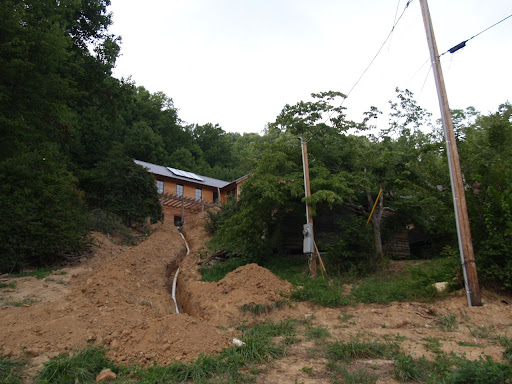 When I was at the hardware store buying the PVC fittings, I saw the cleanout junctions and thought "gee it's probably a good idea to put one of those in too." Later I found out that its CODE and if I hadn't done it I would have been digging the system up to put one in.
 After the pipe is laid, we can fill it up...
 and reuse some of that ditch for another roof gutter drain:
 George did a snifty job routing the combined drain past the heavily laden peach tree so that we'll have a lot less erosion from now on.
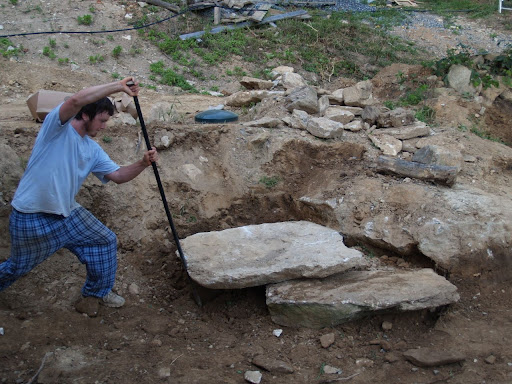
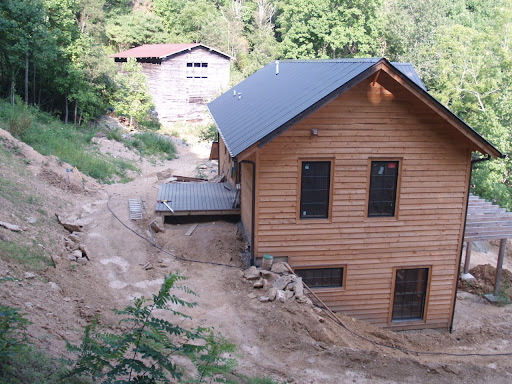
 With all the digging out of the way we could start grooming the arbor area which will eventually get paved with flagstone.
 On the other side of the house, the carpentry crew whipped out the back deck. This will allow access to the upper floor without a single stair step, a feature recommended by more than one of you.
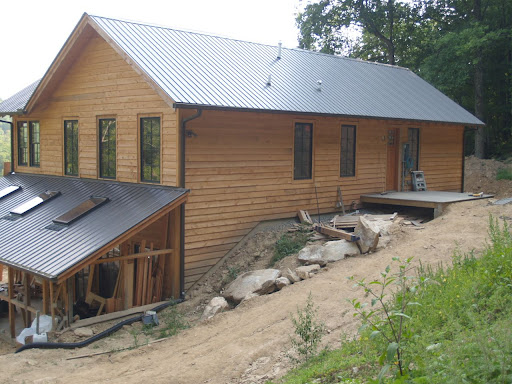

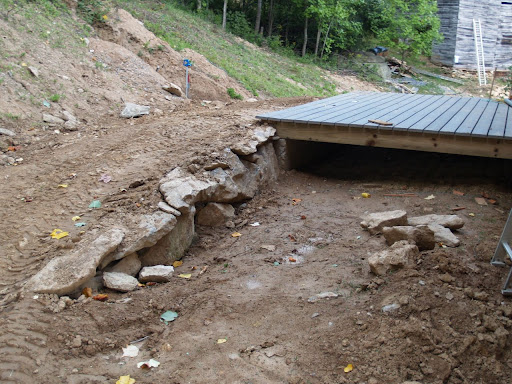
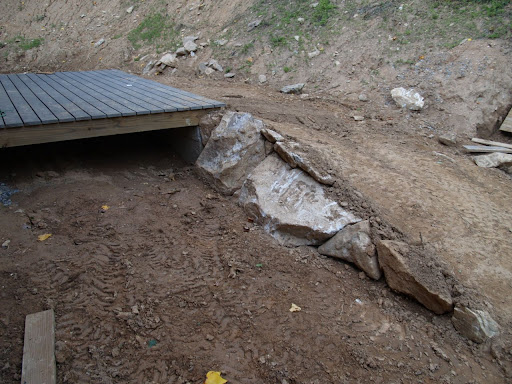
 We used some of the indiginous rocks to build retaining walls that allow the dirt to slope away from the house but still go up to the level of the deck. Fiona (here for a visit) supervises my dicey tractor work
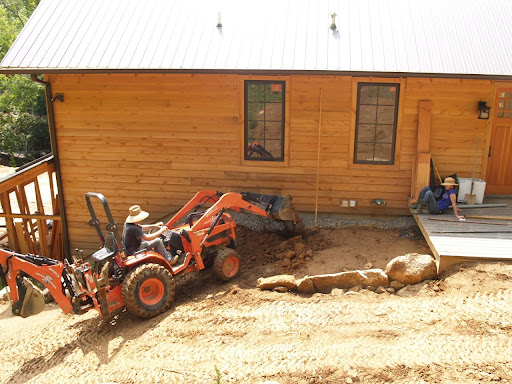
 George hefts a rock for the wall
 After the deck, Steve and Dave focussed on finishing work. We put smaller baseboards into the closets (which will eventually be lined with cedar), and installed doorstops (seen on the right)
 They also got the handles on all the interior doors. Charla selected some very nice Emtek hardware - can you tell how hefty it is from this picture?
Scott returned from Virgina with that last piece of shelf and installed all the kitchen cabinet knobs (the brand is Hafele):
Oh and then there was hitch #6. The electricians could not find a way to squeeze the bathroom light switch far enough over to allow the door trim. Our Vashon house had trim carved out to accomodate the light switches and I hated that for years. A pipe in the wall only allows a smaller box if you go to the right. I think I'll get this worked out after the final inspection, for reasons you might surmise.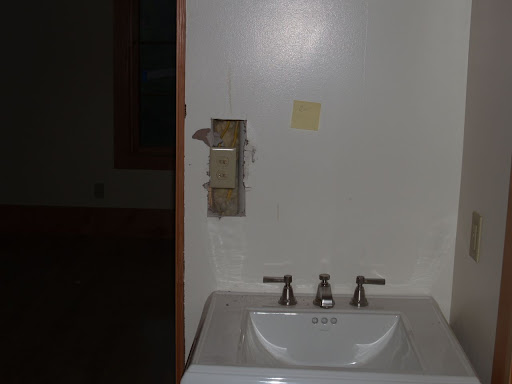 OK - CALL FOR THE FINAL INSPECTION!!!!!!
And BTW, get all the tradesmen to call or call again for final inspection (the county won't come until everyone has called).
Thursday, September 4, 2008: Billy the county building inspector drives up, explains he has just come from another final inspection that he failed; in fact he hasn't passed any inpection so far today. He walked around, asked for some specs on our appliances to make sure the electrical and exhaust were sized appropriately, checked for my sewer-line cleanout, and passed us! With one caveat - I need to send documentation on the hand-held shower fixture shown here:
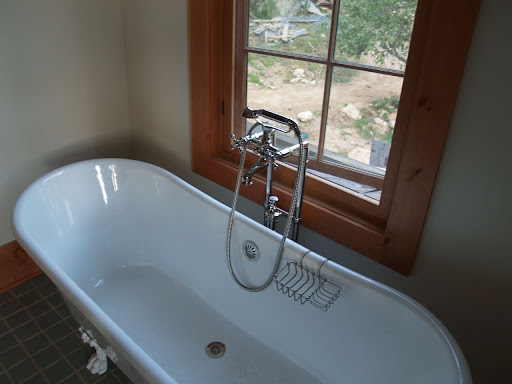 He wanted documentation for the file that it has an anti-siphon device on it (so you don't suck bathwater into your potable water system if the water gets turned off). I told him certainly it had one (wouldn't any reputable maker of such a device build one in?) and I would fax the documents. Then I searched the documents and finally called the manufactuer only to find out that this is an optional feature that the Feguson lady didn't mention. Hitch #7! Charla got one on order and I'll bring down the documents once we get it installed.
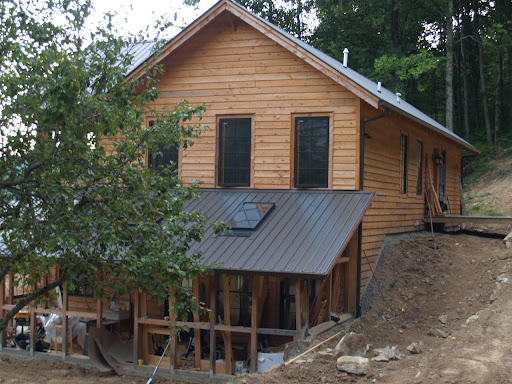
Meanwhile we got passed, and here are some sunset shots of our satisfactory abode: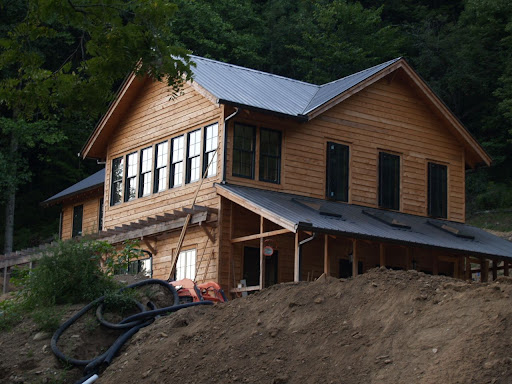
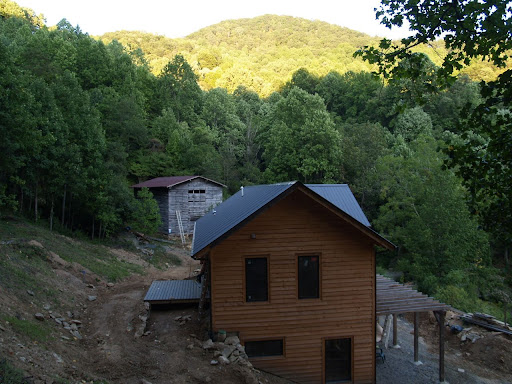
 Understandably, Charla is ready to get things set up for occupancy.
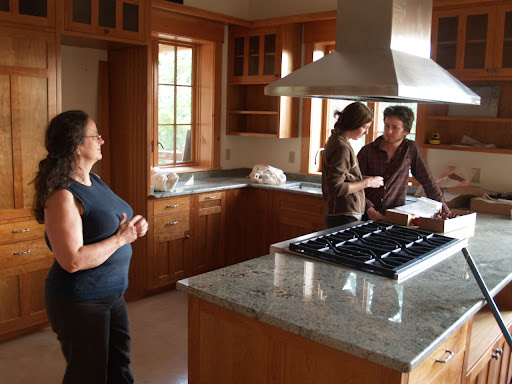 Lets start with a bed
 And a spice rack.
 The next day, the French Broad man is back to do that final hookup.
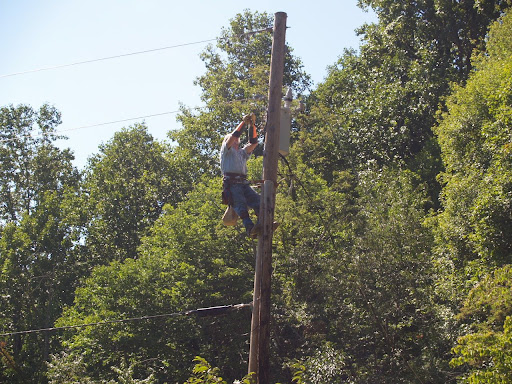 and let there be light!
 But once the power is on, you find out all the electrical circuits are not working. In fact, a surprising amount was not working. But our electrican was responsive and on Tuesday Al and Paul were back out to diagnose and fix things (and put light bulbs into the fixtures).
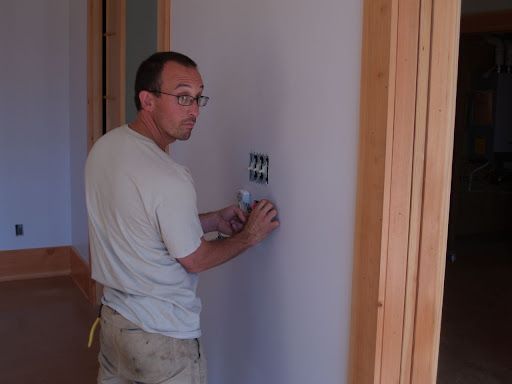 Meanwhile the tide was making fast into the kitchen...
 We got the fridge installed - its a beauty -
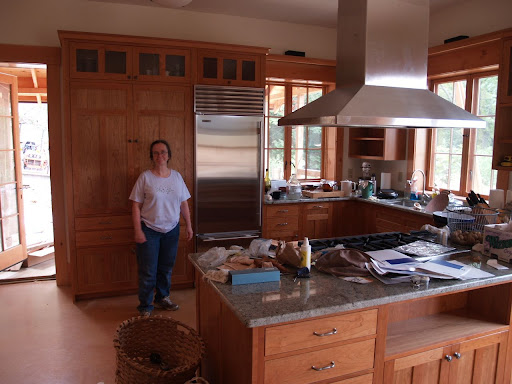 And the stove fully functioning (the Blosman propane guys were out Monday afternoon to complete the gas hookup).
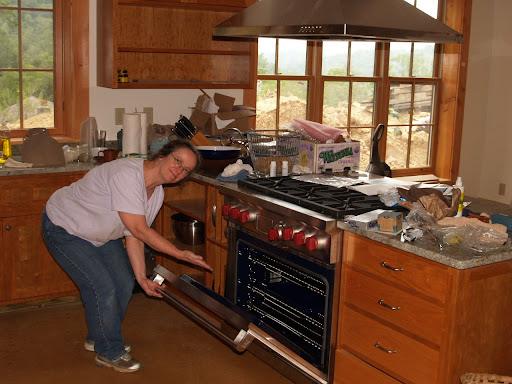 Poles into the closets...
 And on Tuesday, Sundance Power came an charged the solar hot water heater and fired the boiler.
 This readout shows that the temperature of the water in the solar collectors on the roof is 116 degrees on this cloudy day (today it reached 160).
 Meanwhile there is much finishing work to do. Currently the outdoor rockwork continues: George is really getting into making these steps nice.